Create PostgreSQL RDS
This guide walks you through the step-by-step process of creating a PostgreSQL RDS instance on our cloud console.
Step 1: Select Region and Billing Options
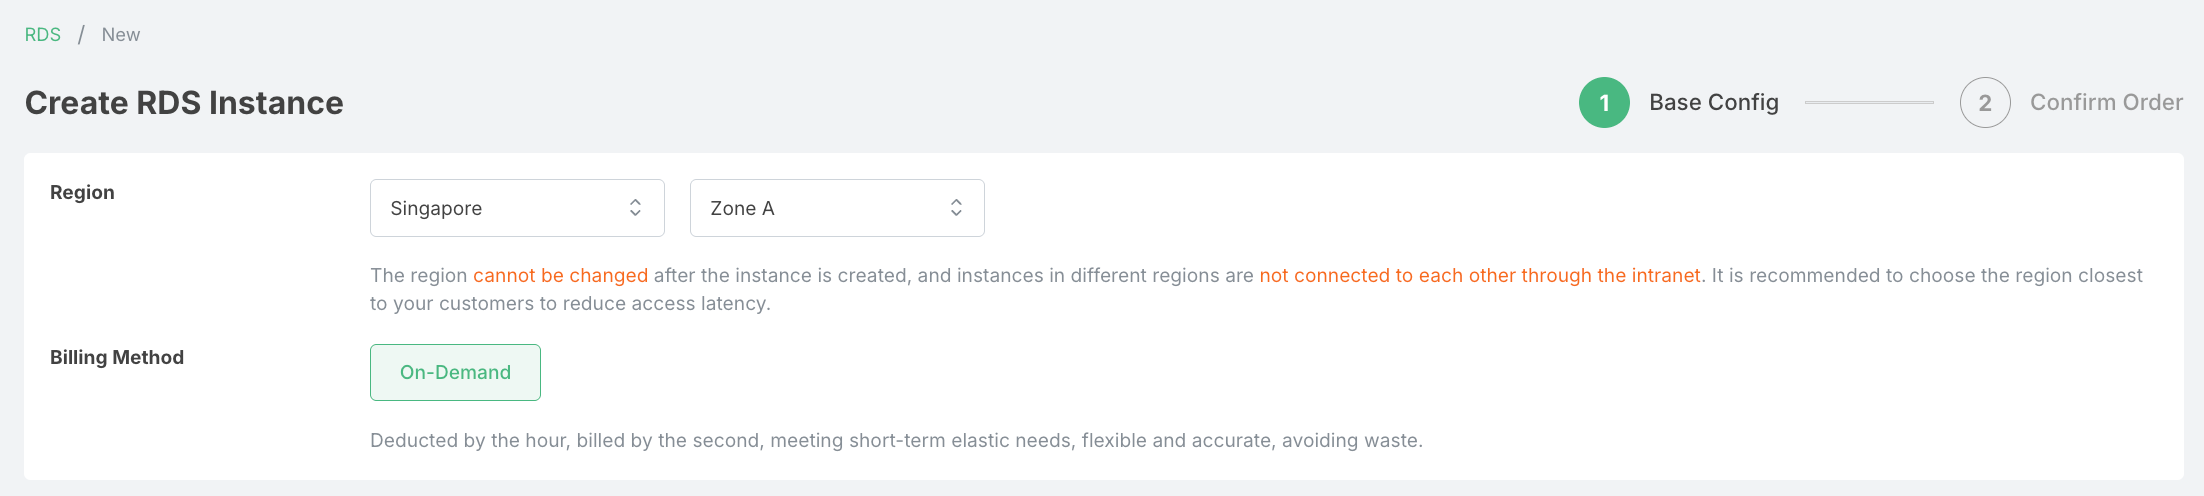
- Choose your preferred deployment region from the dropdown menu
- Select your billing mode -
On DemandorSubscription(Currently RDS supports On-Demand billing) - Review the pricing information for your selected options
Step 2: Choose Instance Type
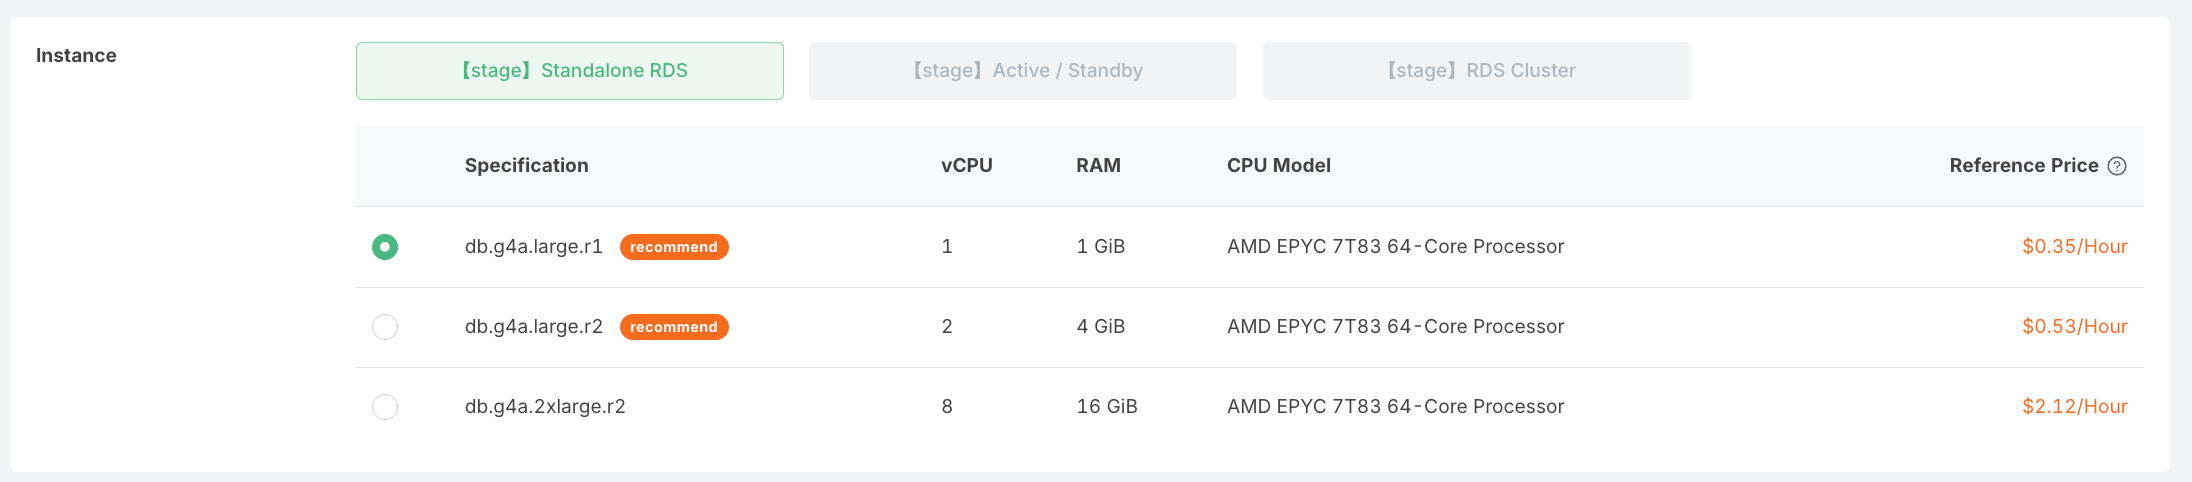
- Select your preferred deployment mode:
- Standalone: Single node deployment for development or testing
- Primary/Standby: High-availability setup with automatic failover (Coming soon)
- Cluster: Multi-node deployment for maximum performance and scalability (Coming soon)
- Choose the instance specifications based on your workload requirements:
- CPU cores
- Memory size
- Storage capacity
- Review the pricing details for your selected configuration
Step 3: Configure Database and Extensions

- Select the PostgreSQL version you want to deploy
- Choose which database extensions you want to enable:
- Analytics extensions
- Geographic extensions
- Full-text search extensions
- Other specialized extensions
Note that the default we recommend to select "Security" and "Monitoring" modules for production database and observability.
Step 4: Configure Storage and Network
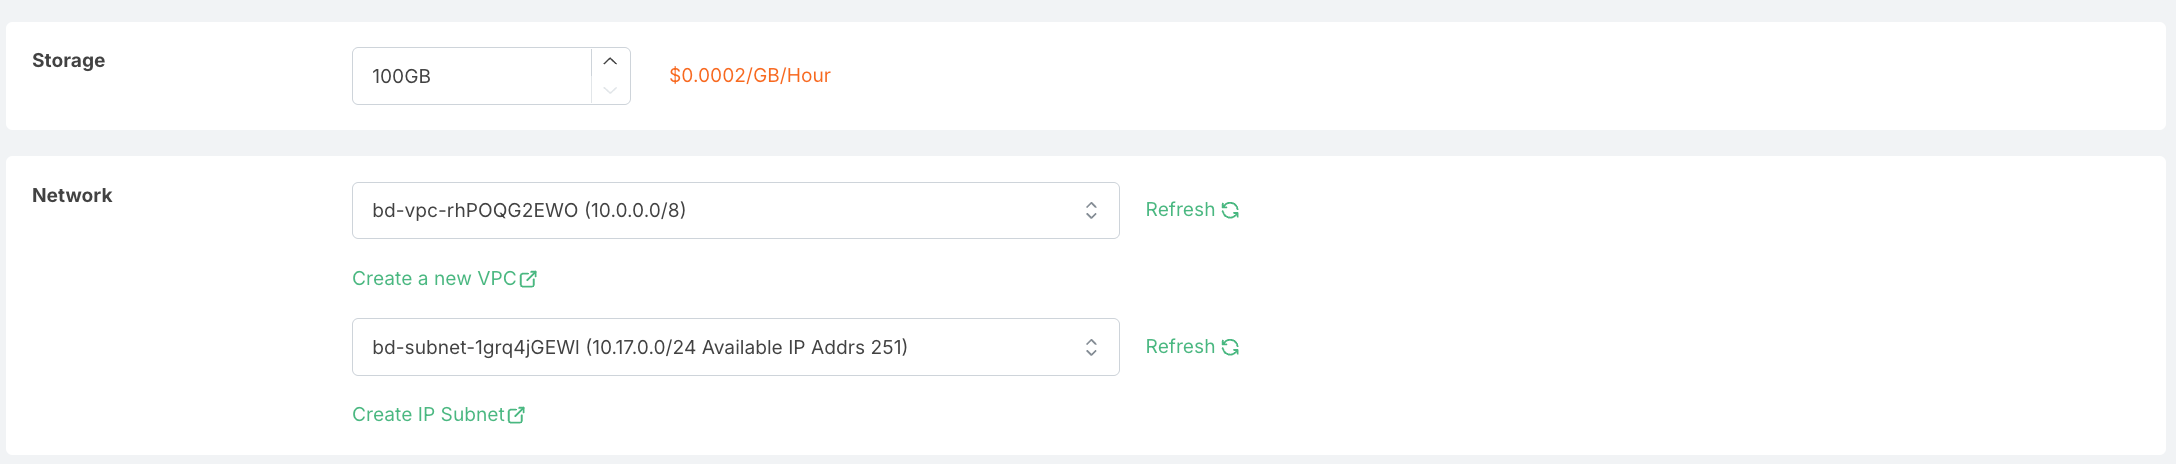
- Set your storage configuration:
- Storage size (GB)
- Enable/disable auto-scaling
- Set storage scaling thresholds (if enabled)
- Configure network settings:
- VPC selection
- Subnet selection
- Public accessibility (enable/disable)
- Set custom port number (default: 5432)
Step 5: Configure Security Groups
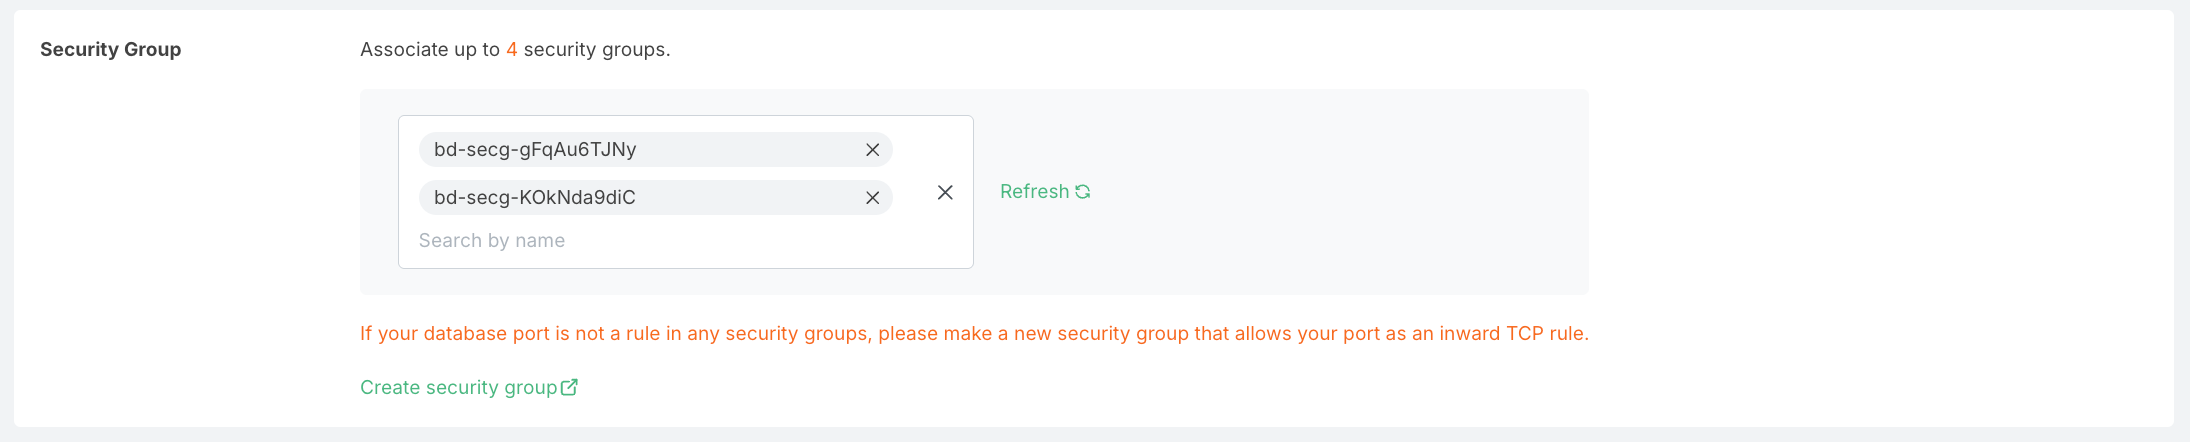
- Select existing security groups or create a new one
- Configure inbound and outbound rules:
- IP ranges
- Port access
- Protocol settings
- Review security recommendations
Step 6: Set Instance Name and Description
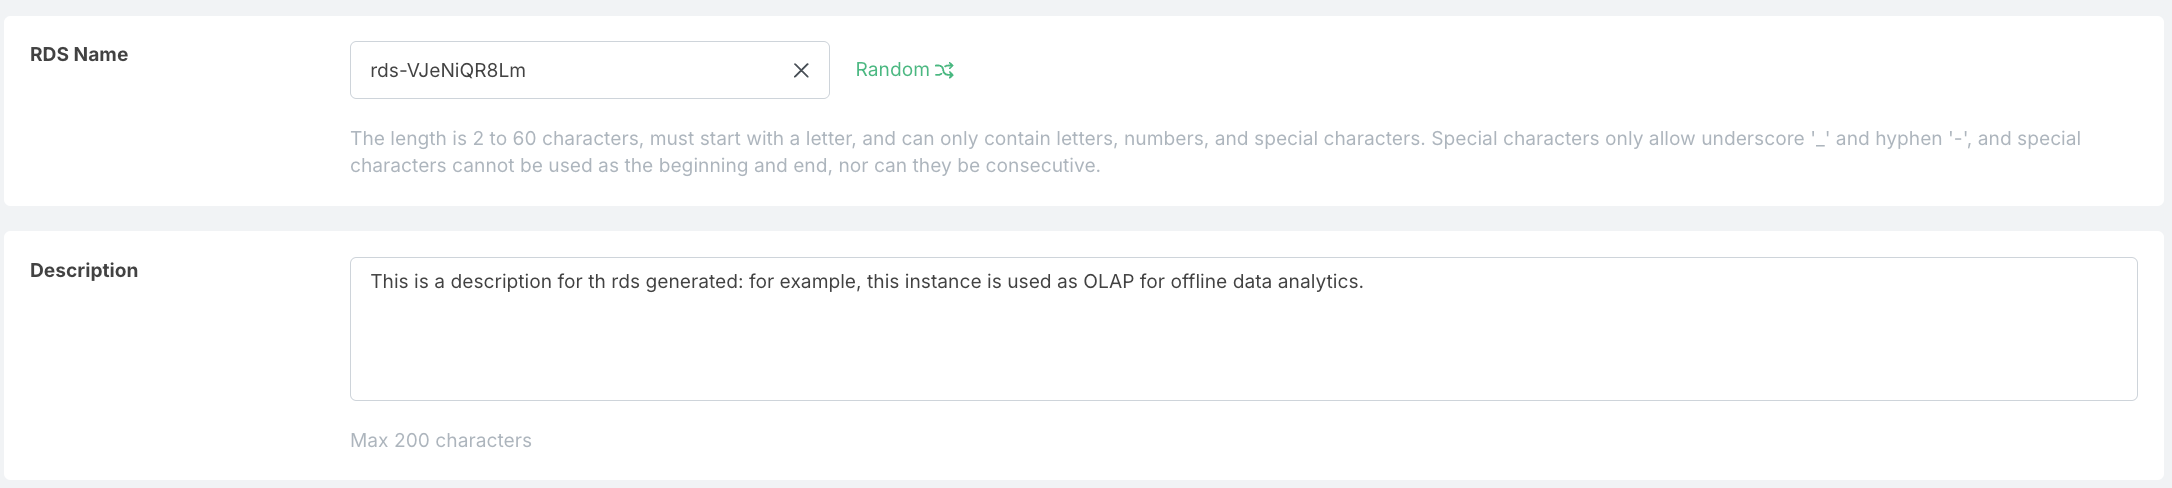
- Enter a unique name for your PostgreSQL RDS instance
- Provide an optional description to help identify this instance
- Click "Next" to continue
Step 7: Configure Username and Password
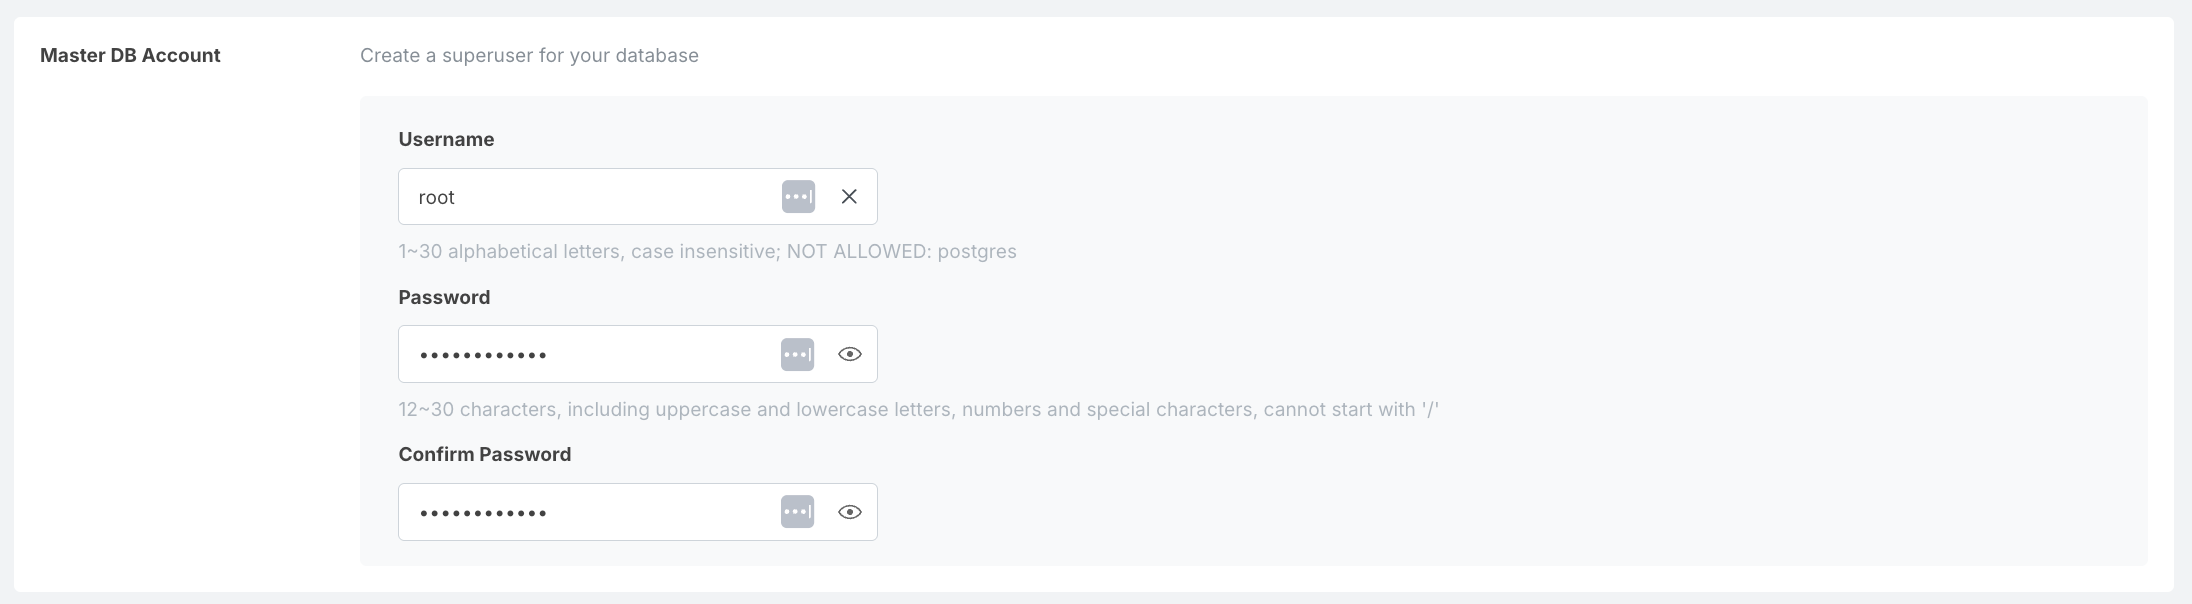
- Set the master username for database access
- Create a strong password following the security requirements:
- Minimum 8 characters
- Include uppercase and lowercase letters
- Include at least one number
- Include at least one special character
- Alternatively, use the "Generate Password" button for a secure random password
Step 8: Configure Backup Settings

- Enable or disable automated backups
- Set the backup retention period (in days)
- Configure backup window preferences
- Enable or disable point-in-time recovery
Step 9: Add Resource Tags
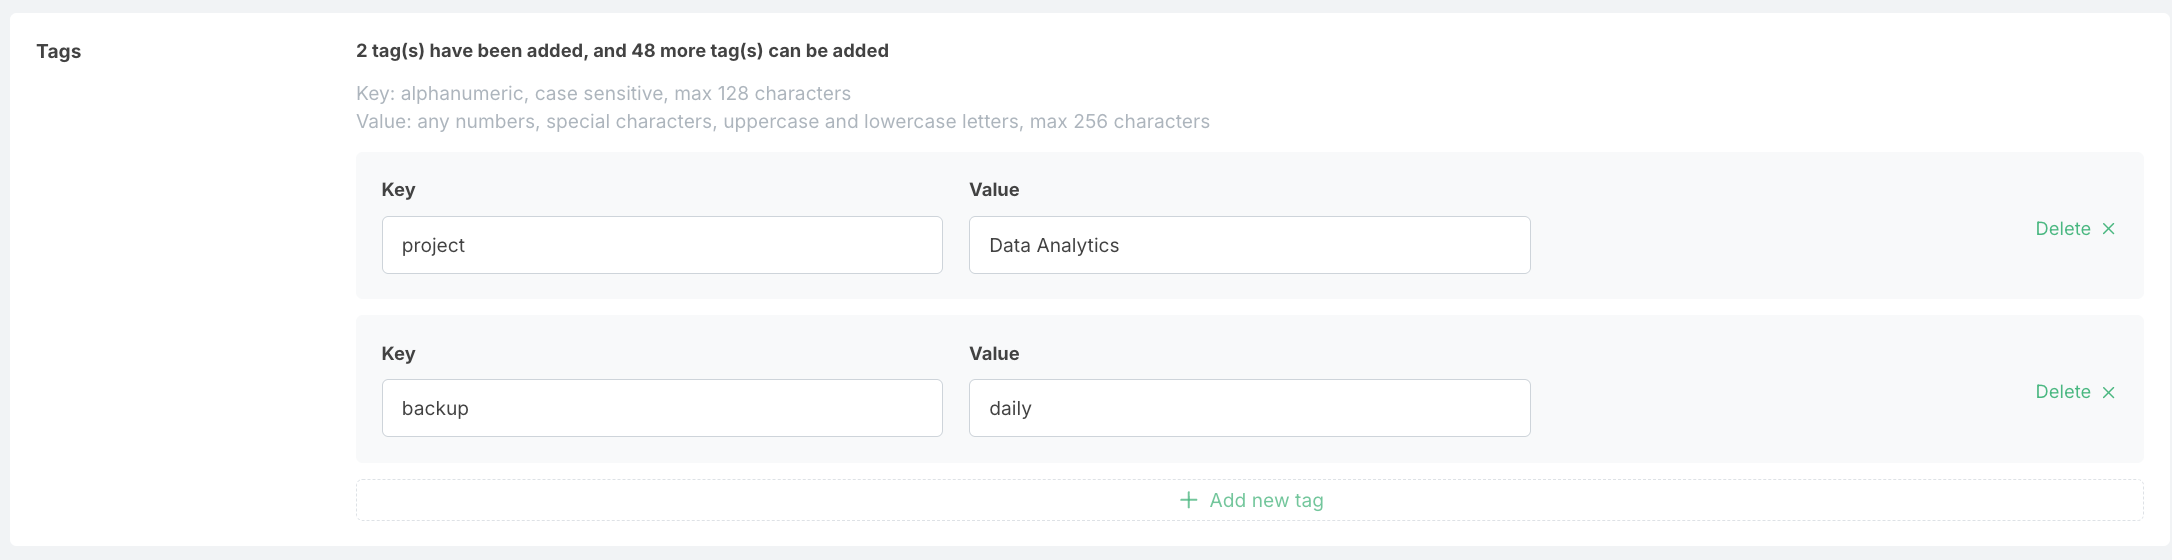
- Add optional tags to help organize and manage your resources
- Tags consist of key-value pairs
- Common tags include:
- Environment (dev, test, prod)
- Project name
- Department
- Cost center
- Review all configurations
Next Steps
After your PostgreSQL RDS instance is created:
- The provisioning process will begin and may take several minutes to complete
- You can monitor the creation progress on the RDS dashboard
- Once the status changes to "Running," your instance is ready to use
- Connect to your database using standard PostgreSQL client tools with the connection details provided
- Create additional databases and users as needed
- Configure monitoring and alerts for your instance
For more information on managing your PostgreSQL RDS instance, please refer to our management guide.
The estimated amount of hourly cost is displayed at the bottom of the order page:

Click Confirm to review changes before final submission of orders:
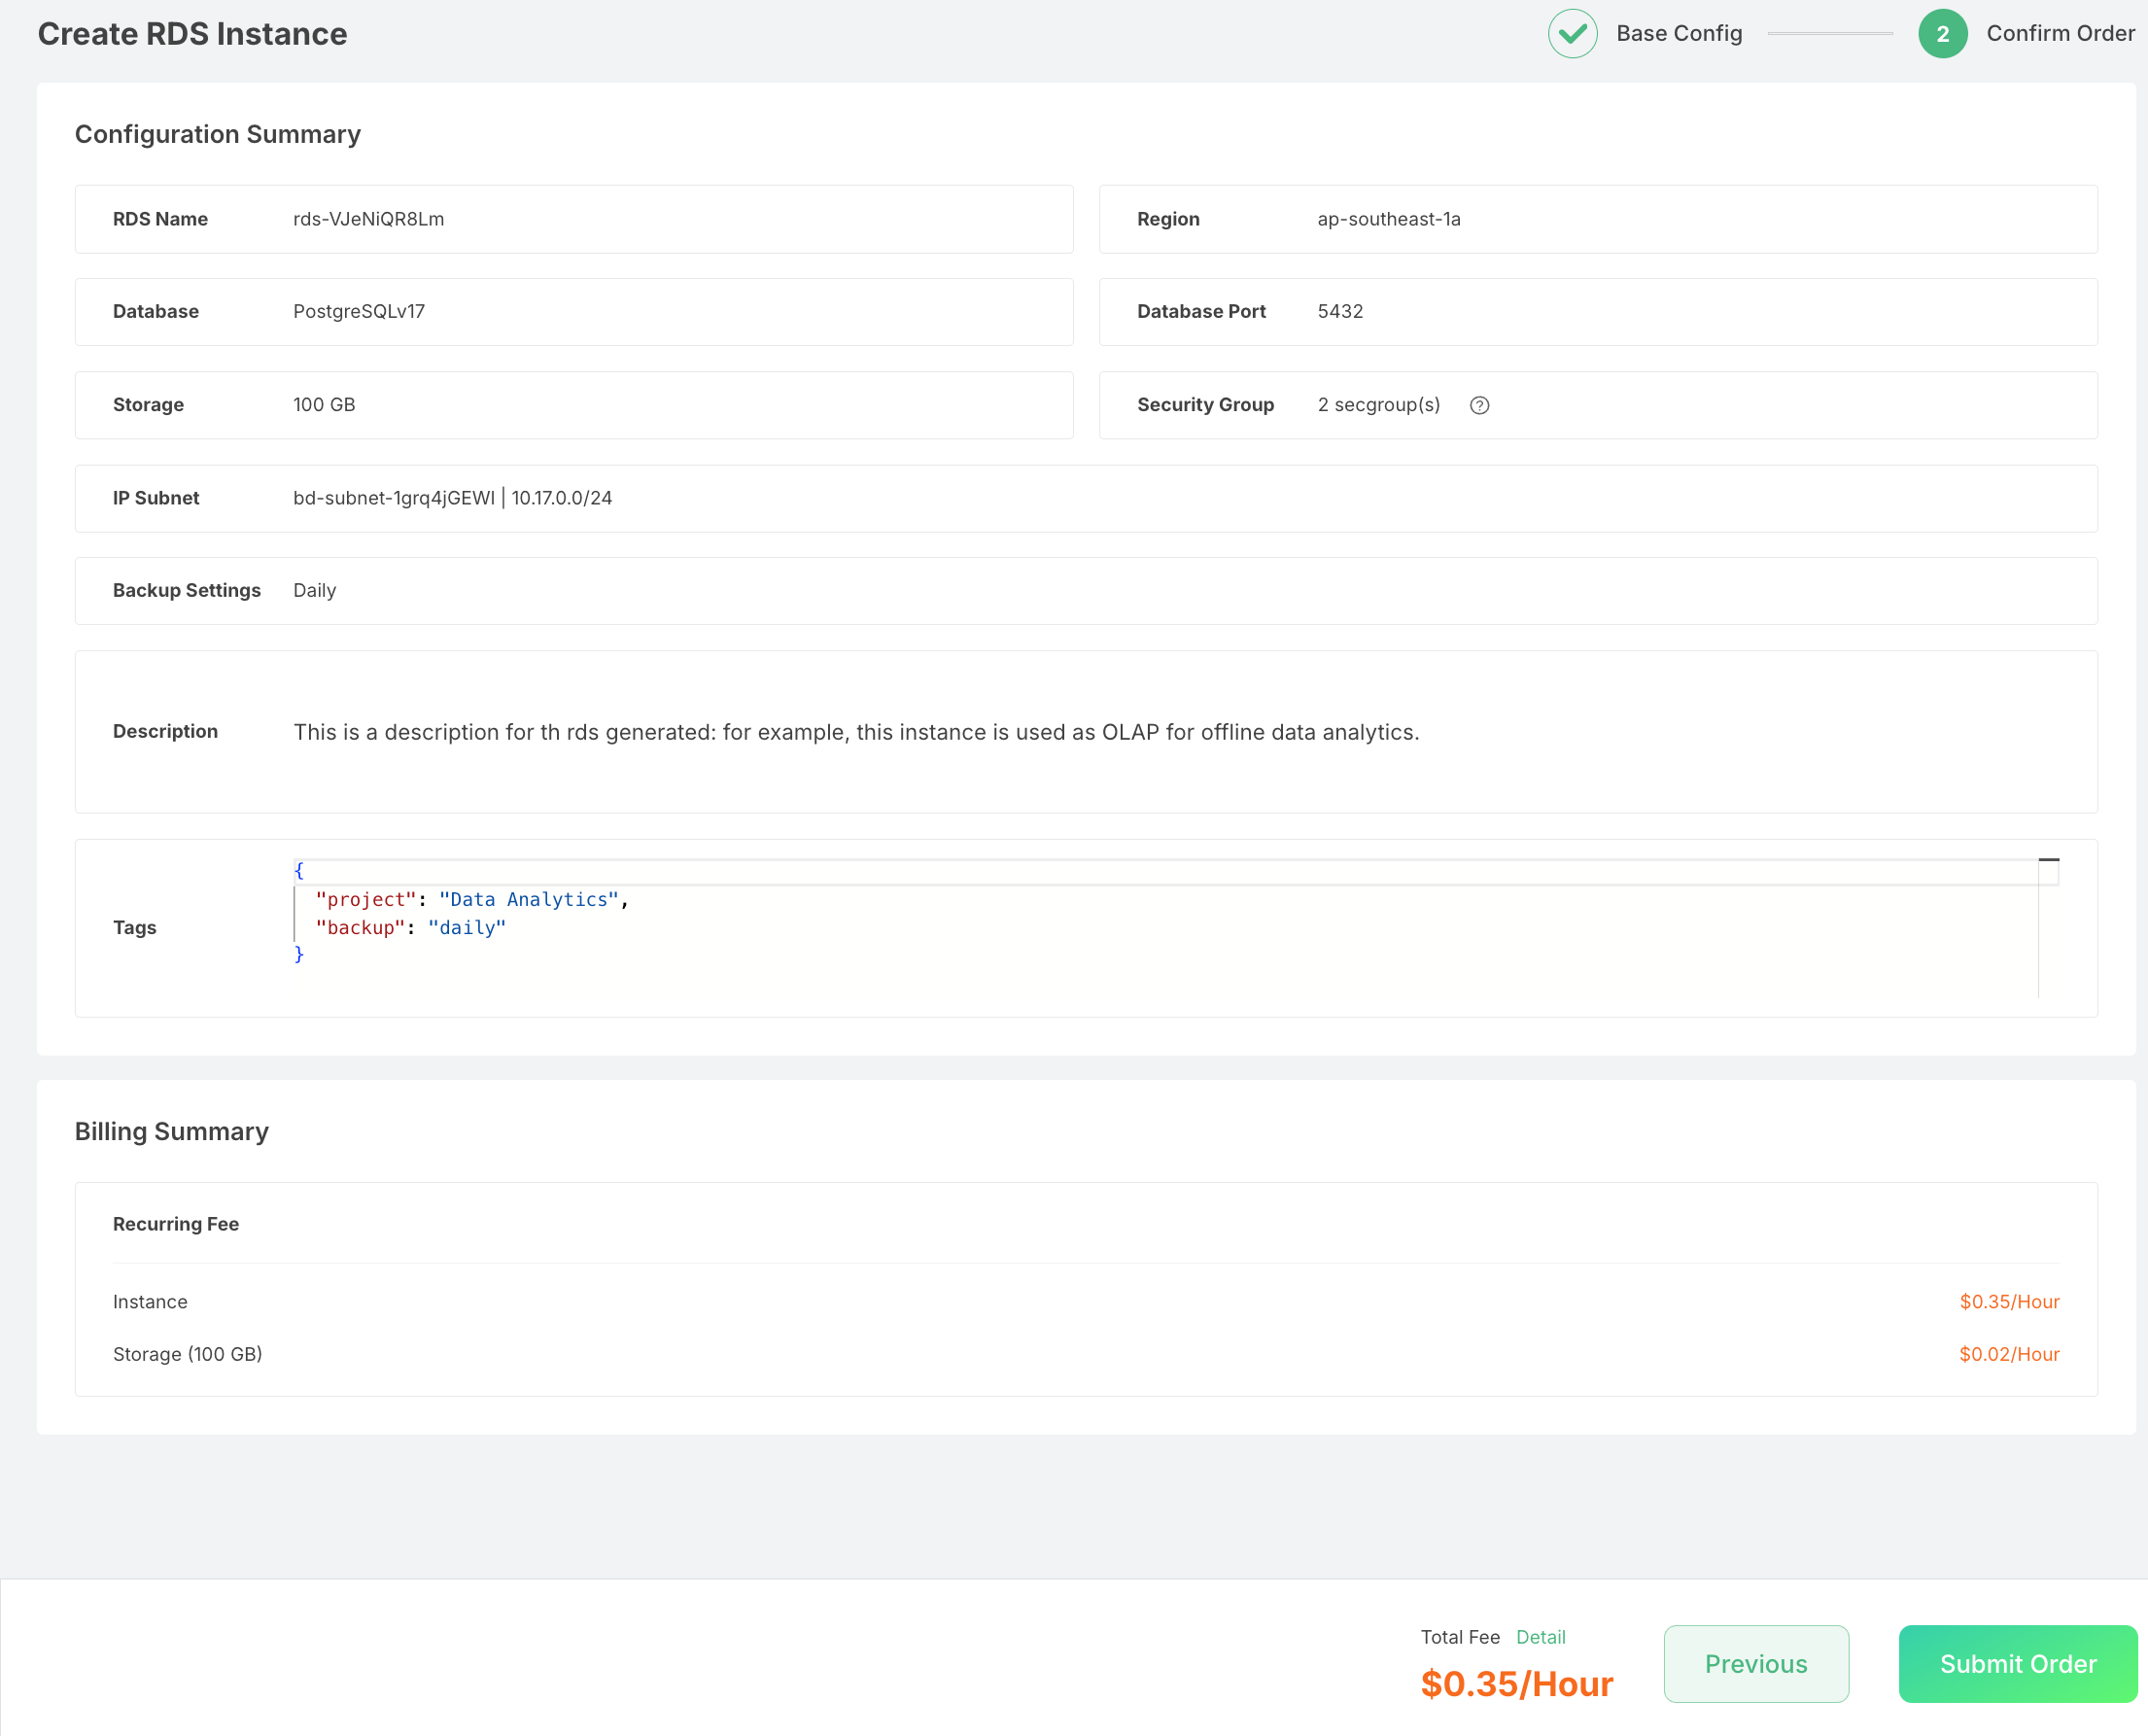
Click Submit Order to start creation of database