Disk Expansion
Last updated: 2025-07-10 15:31:04
Operation Scenarios
This document describes how to expand the storage capacity of cloud disks via the console, including both system disks and data disks, as well as related operational notes.
Prerequisites
Disk Status Requirements
- The disk must be in "In Use" or "Available" status.
- The disk cannot be in "Creating", "Attaching", "Detaching", or "Deleting" status.
Instance Status Requirements
- System Disk: The instance must be in a stopped state.
- Data Disk: The instance can be either running or stopped.
Capacity Limits
- System Disk: Maximum 4TB
- Data Disk: Maximum 4TB
- Expansion can only increase capacity, not decrease it.
Expansion Rules
Ondemand Disk
| Operation | Requirement | Effective Time | Billing Method |
|---|---|---|---|
| Expansion | No special restrictions | Takes effect immediately | Billed at the new capacity rate |
For detailed billing rules regarding disk expansion, please refer to Configuration Change Fee
2.2.4 Operation Steps
- Log in to the Cloud Server Console.
- In the left navigation bar, select "Servers" to enter the cloud server list page.
- Find the instance you want to operate on and click its "Instance ID" to enter the instance details page.
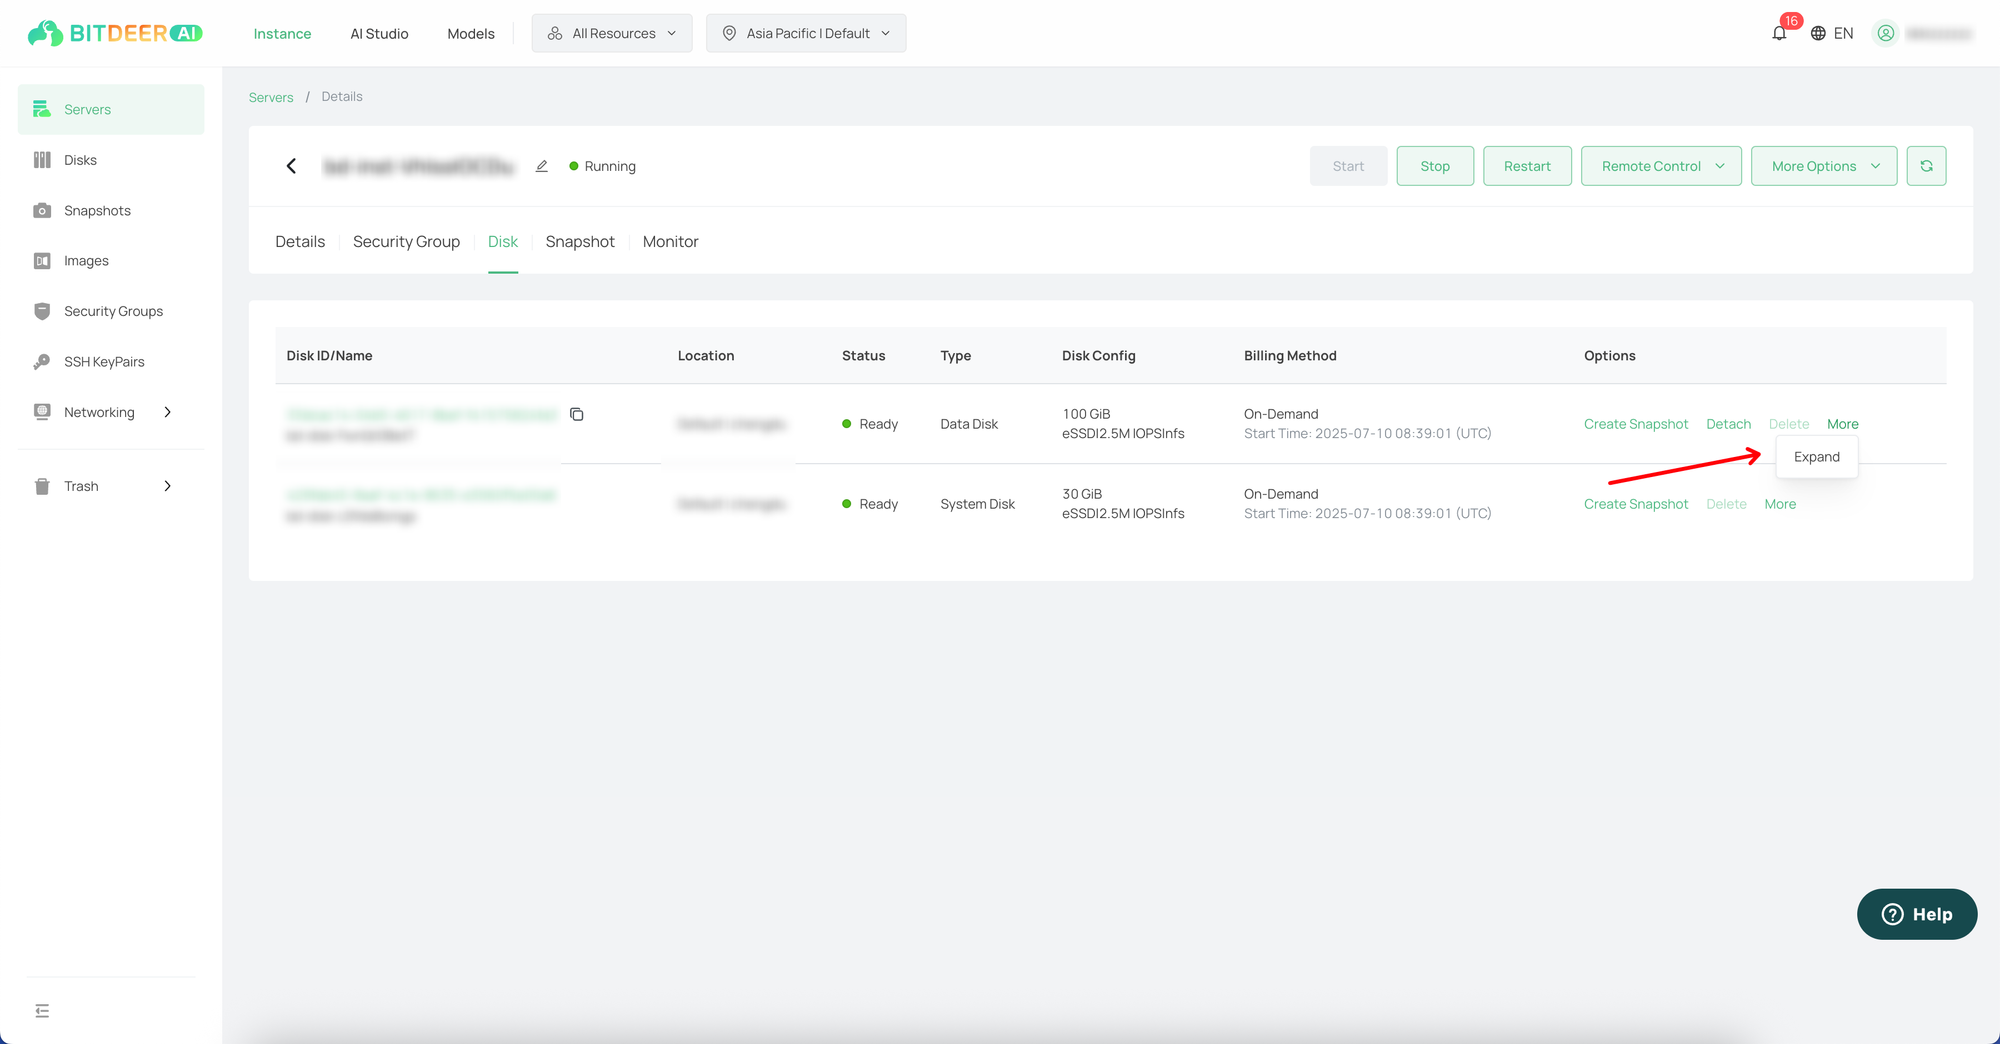
- On the instance details page, click the "Disk" tab to switch to the disk list.
- In the disk list, find the disk you want to expand, and in the corresponding row's operation column, click "More > Expand".
- In the "Expand Disk" dialog box, enter the new disk capacity. The system will display the price difference after the capacity change.
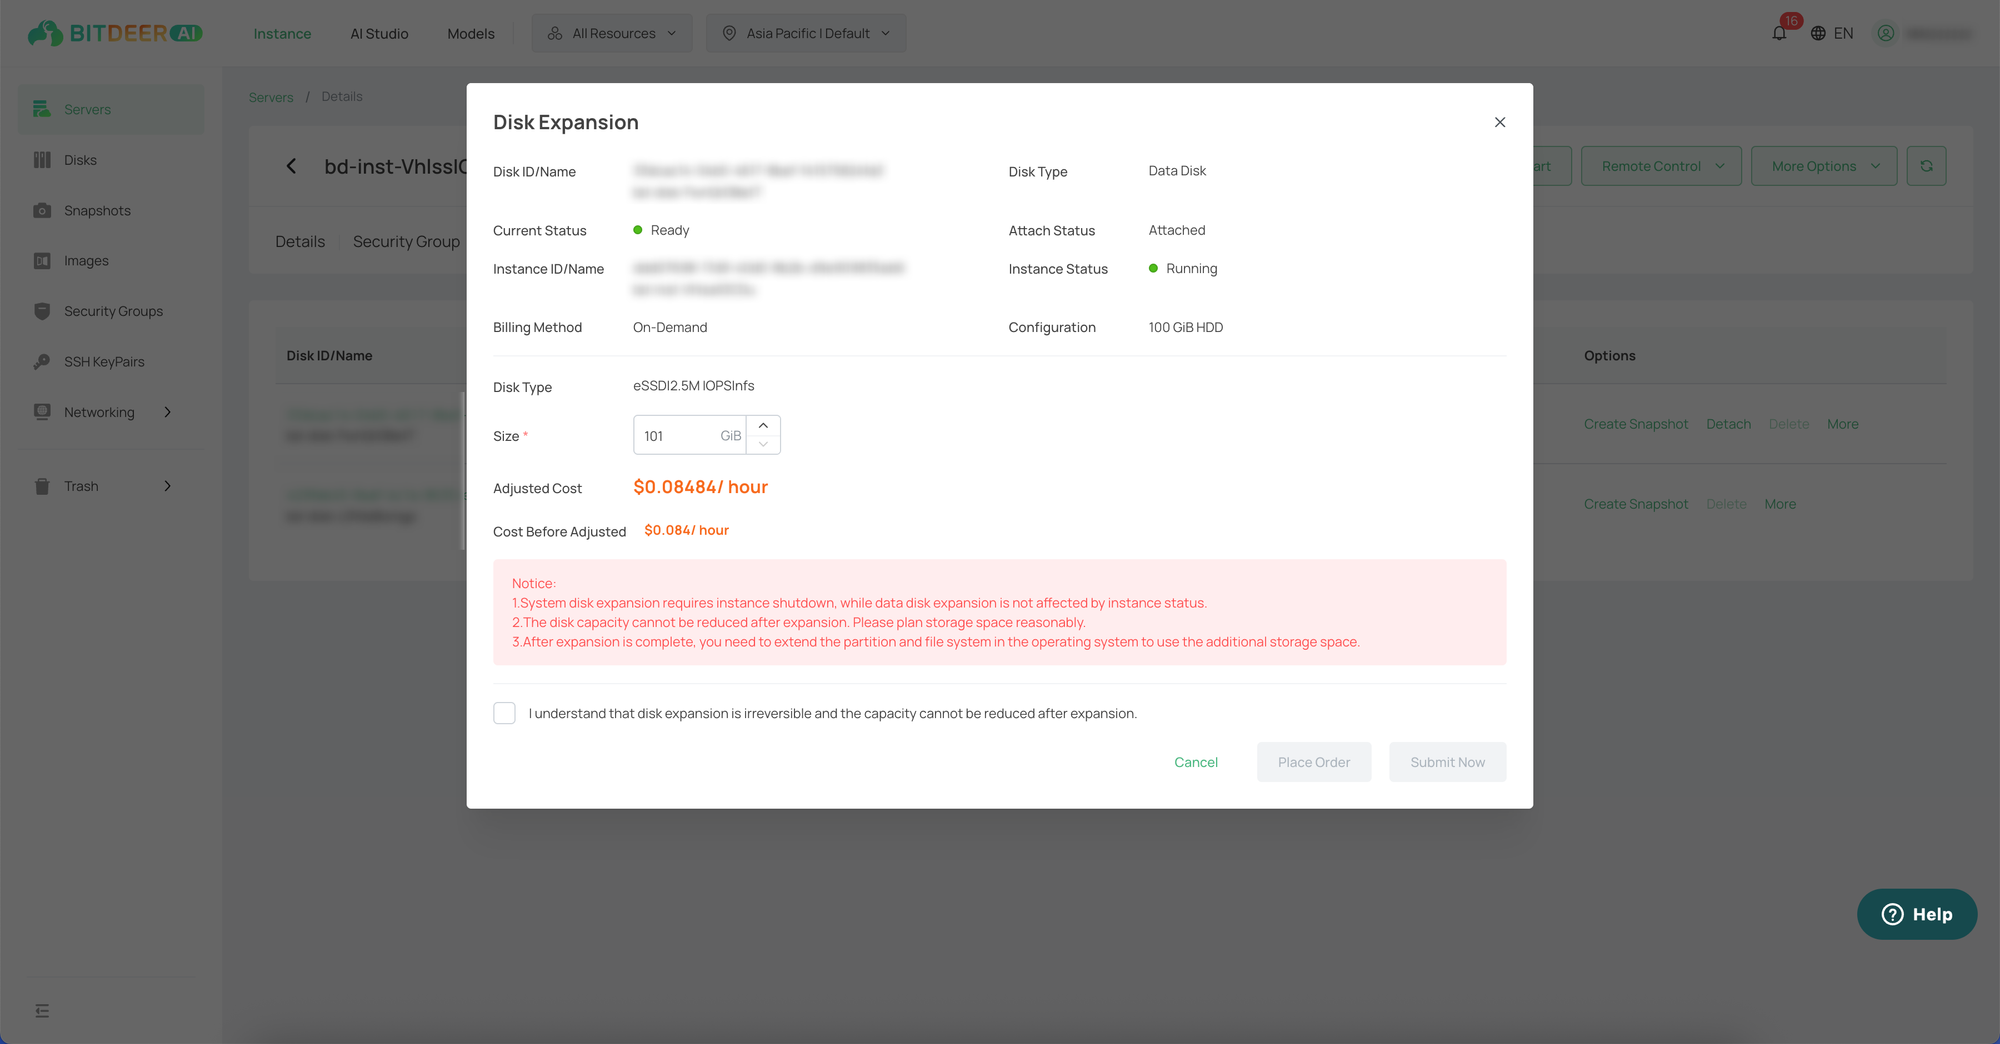
- After checking "I am aware of the relevant risks", click "Confirm". Please review the order information and complete the activation on the order page.
Related Documentation
To expand a disk via the Disk Console, please refer to Disk Expansion.