Connect to Instance
Last updated: 2026-06-17 21:26:03
Overview
After creating an instance, you need to connect to it remotely for management and operations. The platform provides three connection methods: Web SSH, VNC Console, and Local Client SSH. This guide explains when to use each method, prerequisites, and step-by-step instructions.
What you’ll accomplish: After completing this guide, you will be able to connect to your running instance using the most suitable method for your scenario.
Connection Methods Comparison
| Method | Public IP Required | Password Required | Key Pair Required | Use Case |
|---|---|---|---|---|
| Web SSH | No | Yes | No | Quick browser-based terminal access |
| VNC Console | No | Yes | No | Access instance desktop/terminal when SSH fails |
| Local Client SSH | Yes (or VPN) | No | Yes | Use local terminal with key-based auth |
Prerequisites
Before connecting, ensure:
- Instance is Running: The instance must be in Running status. Remote connection is not available for instances that are creating or stopped.
- Login Password (for Web SSH and VNC): If the instance was created with a key pair and has no password set, you must reset the password first.
- Key Pair (for Local SSH): The instance must be bound to a key pair. Download and save the private key (
.pem) to your local machine. - Security Group (for Web SSH and Local SSH): The security group must allow inbound traffic on TCP port 22.
Method 1: Web SSH Remote Terminal
Web SSH connects through the platform proxy and does not require a public IP. It works with username and password.
When to use: Quick access from any browser without installing SSH clients or configuring keys.
Steps:
- Log in to the Bitdeer AI Cloud Console.
- Navigate to Compute → Cloud Server → Instance List.
- Find your running instance and click Remote Control in the Actions column.
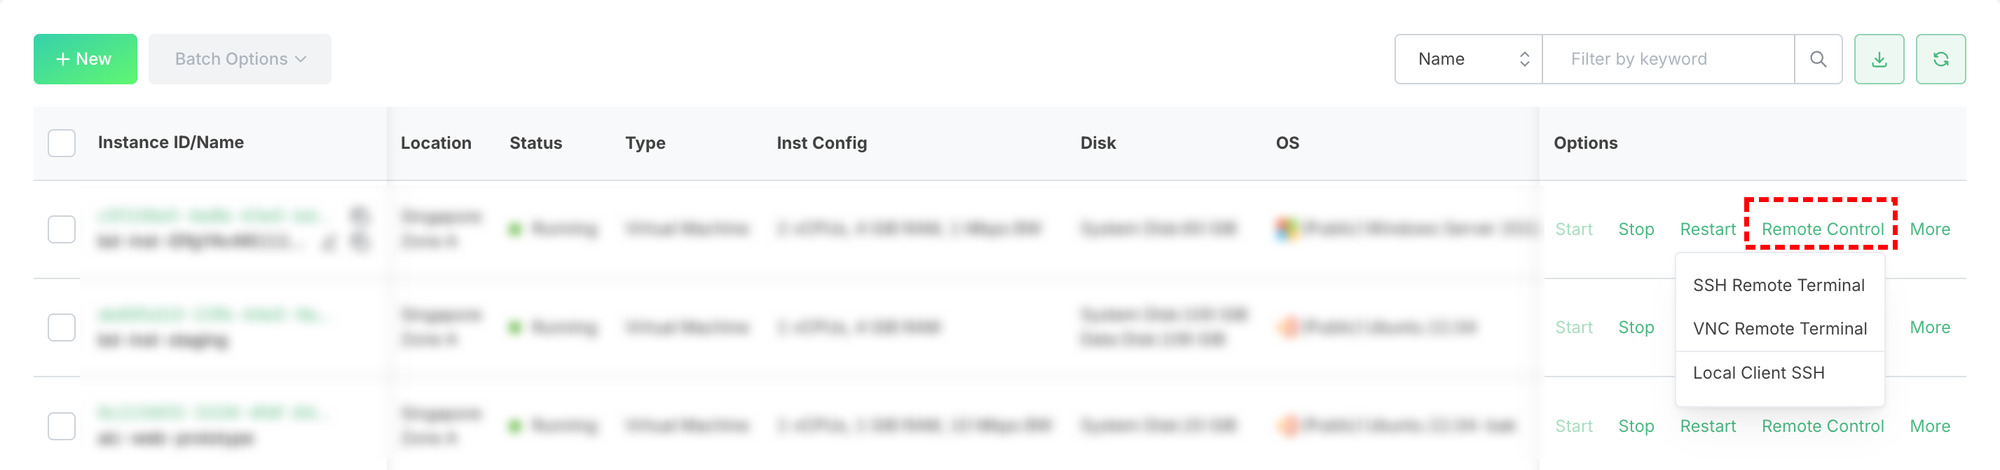
- Select SSH Remote Terminal (Web SSH).
- In the login dialog:
- Username: The default user varies by operating system (e.g.,
rootfor CentOS,ubuntufor Ubuntu). Enter the correct username for your image. - Password: Enter the instance login password.
- Username: The default user varies by operating system (e.g.,
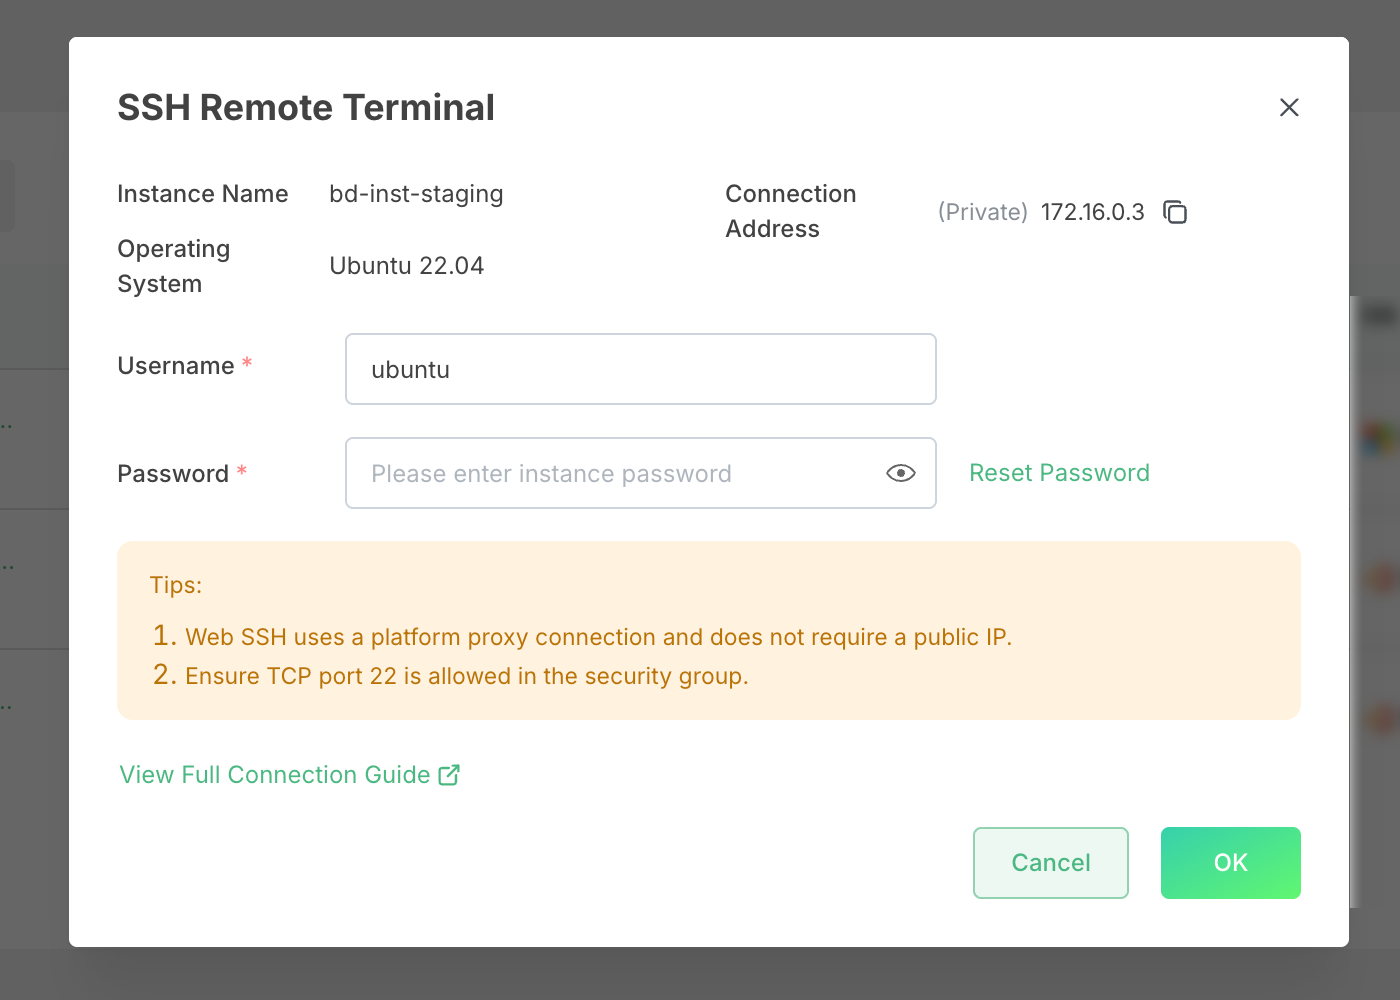
- Click Login to open the Web SSH terminal.
Notes:
- Web SSH uses the private IP via platform proxy; no public IP is needed.
- Security group must allow TCP 22.
- If you forgot the password, use Reset Password in instance details.
Method 2: VNC Remote Terminal
VNC provides direct access to the instance desktop or terminal through the browser. It does not require a public IP.
When to use: When SSH is unavailable (e.g., network issues, SSH service down) or when you need graphical desktop access.
Steps:
- Log in to the Bitdeer AI Cloud Console.
- Navigate to Compute → Cloud Server → Instance List.
- Find your running instance and click Remote Control in the Actions column.
- Select VNC Remote Terminal.
- Ensure the instance has a login password set. If not, reset the password first.
- Click Open VNC Console to access the instance.
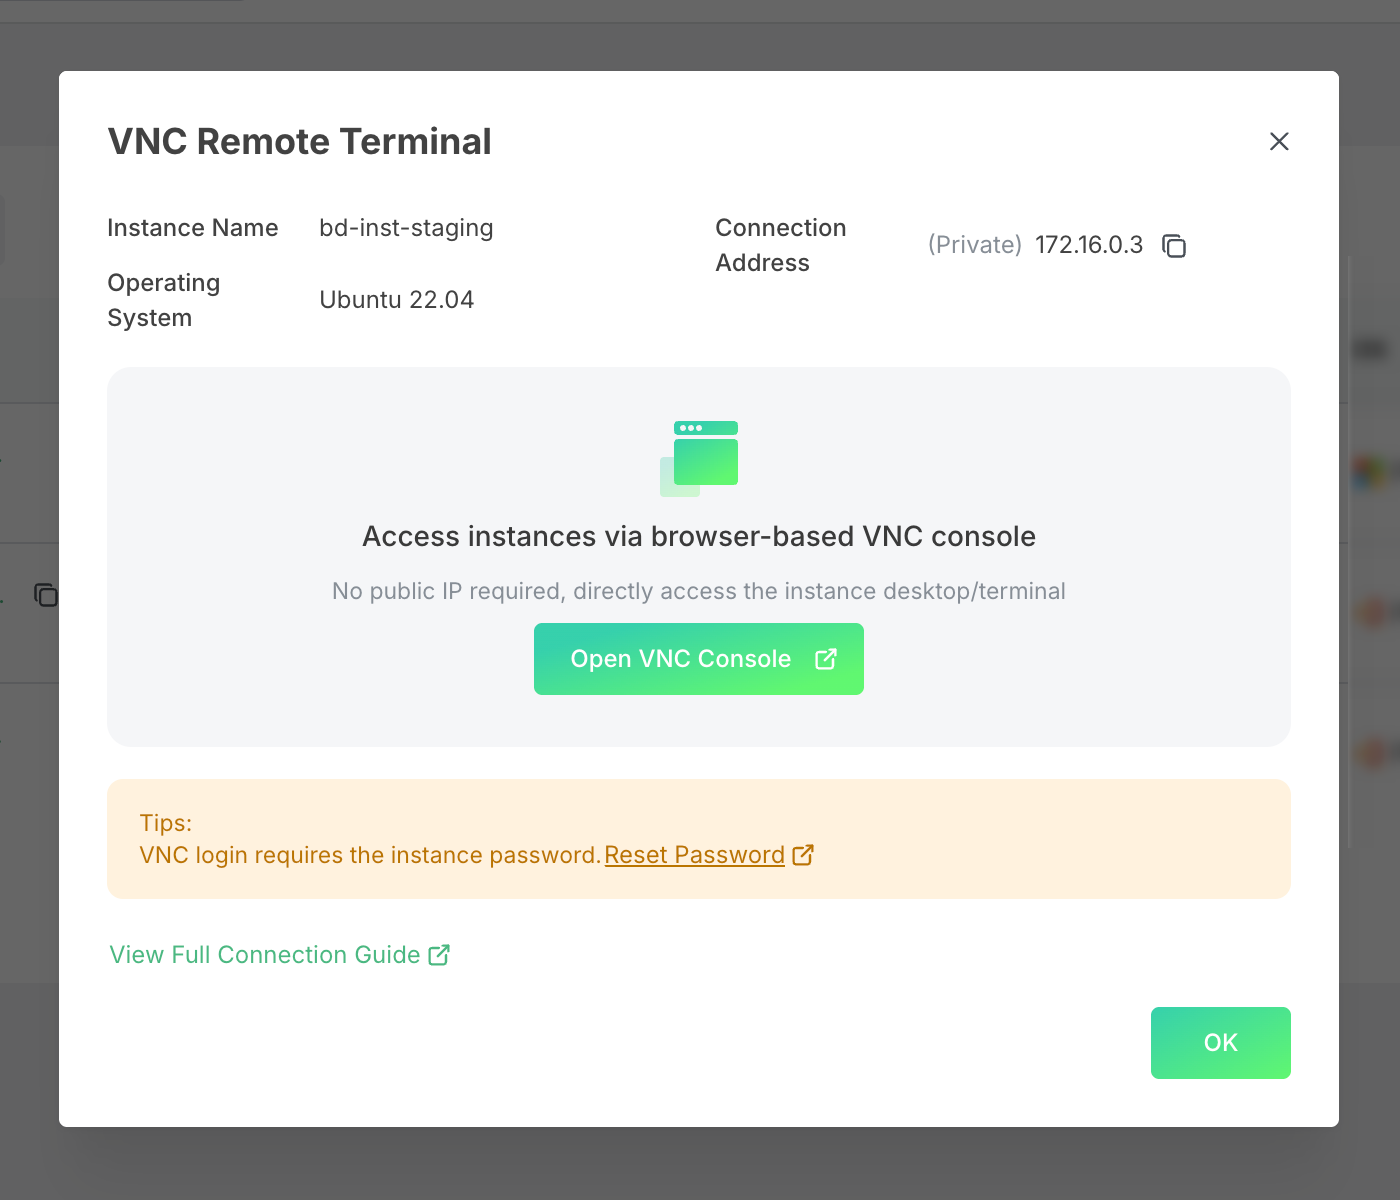
Notes:
- VNC login requires the instance password.
- No public IP or security group configuration for VNC is needed.
Method 3: Local Client SSH
Use your local terminal (macOS, Linux, or Windows) with SSH and the instance’s key pair. This method requires a public IP on the instance (or VPN/bastion host for private IP access).
When to use: When you prefer local tools, need scripted access, or work with multiple instances.
Steps:
- Log in to the Bitdeer AI Cloud Console.
- Navigate to Compute → Cloud Server → Instance List.
- Find your running instance and click Remote Control in the Actions column.
- Select Local Client SSH.
- Copy the SSH command shown in the dialog.
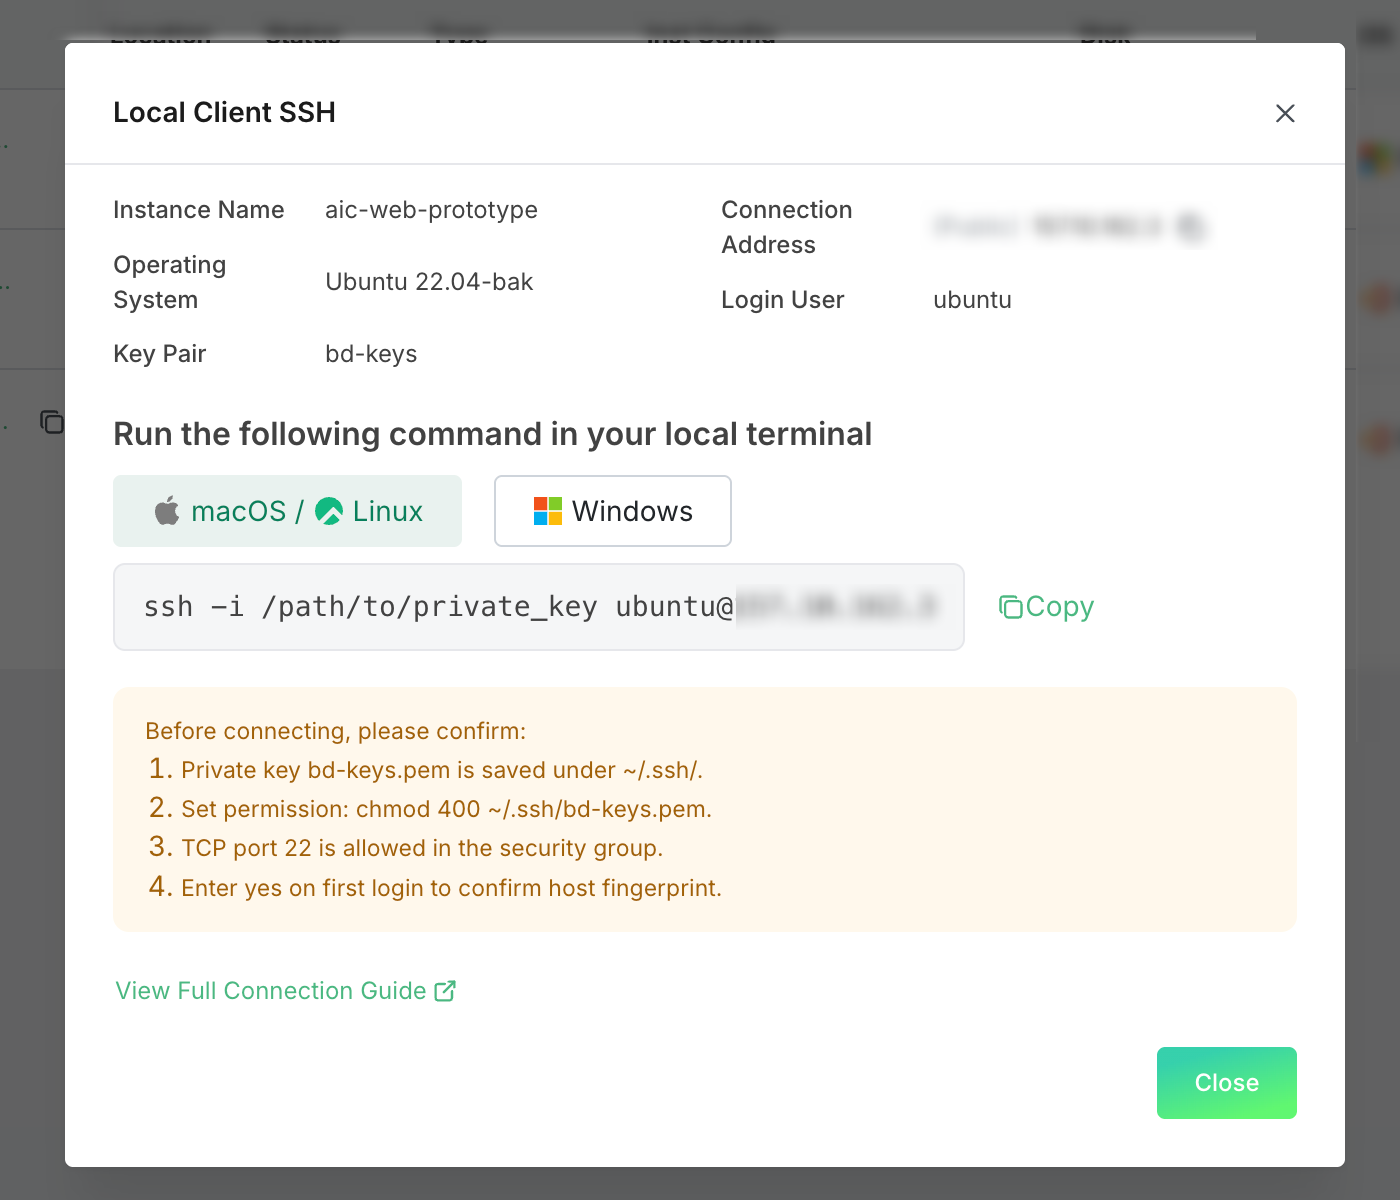
The format depends on your OS:
macOS / Linux:
ssh -i ~/.ssh/<key-name>.pem <username>@<IP-address>
Windows:
ssh -i C:\Users\<YourUser>\.ssh\<key-name>.pem <username>@<IP-address>
The default username varies by operating system (e.g.,rootfor CentOS,ubuntufor Ubuntu). Replace<username>with the correct user for your image.
- Ensure the private key (
.pem) is saved in~/.ssh/(macOS/Linux) orC:\Users\<YourUser>\.ssh\(Windows). - Run the SSH command in your local terminal.
- On first connection, type
yesto accept the host fingerprint.
Set key permissions (macOS/Linux only):
chmod 400 ~/.ssh/<key-name>.pem
If the instance has no public IP:
- Option A: Bind an Elastic IP to the instance, then retry.
- Option B: Use Web SSH instead (no public IP required).
- Option C: Connect via VPN or bastion host using the private IP.
Troubleshooting
| Issue | Possible Cause | Solution |
|---|---|---|
| Cannot connect via Web SSH | Security group blocks TCP 22 | Add inbound rule: TCP 22, source 0.0.0.0/0 or your IP |
| “Password required” for Web SSH/VNC | Instance created with key, no password set | Go to instance details → Reset Password → Restart instance |
| Local SSH “Permission denied” | Wrong key or permissions | Verify key path, run chmod 400 on the .pem file |
| Local SSH “Connection refused” | No public IP or security group blocks 22 | Bind EIP or use Web SSH; check security group |
| VNC shows black screen | Instance not fully booted | Wait a few minutes and retry |